Simple Phishing Incident Triage
Author: Emmanuel Uche-Ihesiulor
This guide walks you through a small n8n workflow that treats inbound email like a security triage queue: a webhook receives the message, Gemini analyzes it, and a Code node turns the model’s reply into clean fields (risk score, severity, recommended action, and so on).
What you will have when you are done
- A POST webhook that accepts a JSON body shaped like AgentMail’s
body.messagefields (sender, subject, text). - A Gemini step that returns only JSON matching a fixed schema.
- Parsed output you can wire to alerts, tickets, or logging in later nodes.
Pipeline at a glance: Ingest Emails (Webhook) → Parse Fields (Set) → Analyze Email Content (Gemini) → Display Results (Code).
Prerequisites
Before you start, you need:
- A running n8n instance (see Deployment).
- A Google Gemini API key from Google AI Studio: sign in with a Google account, then Create API key.
- For a realistic “email hits inbox → n8n runs” test, an AgentMail account (optional; you can also POST sample JSON to the webhook with curl or Postman).
Related reading: Setup, Deploy, Use cases.
Deployment
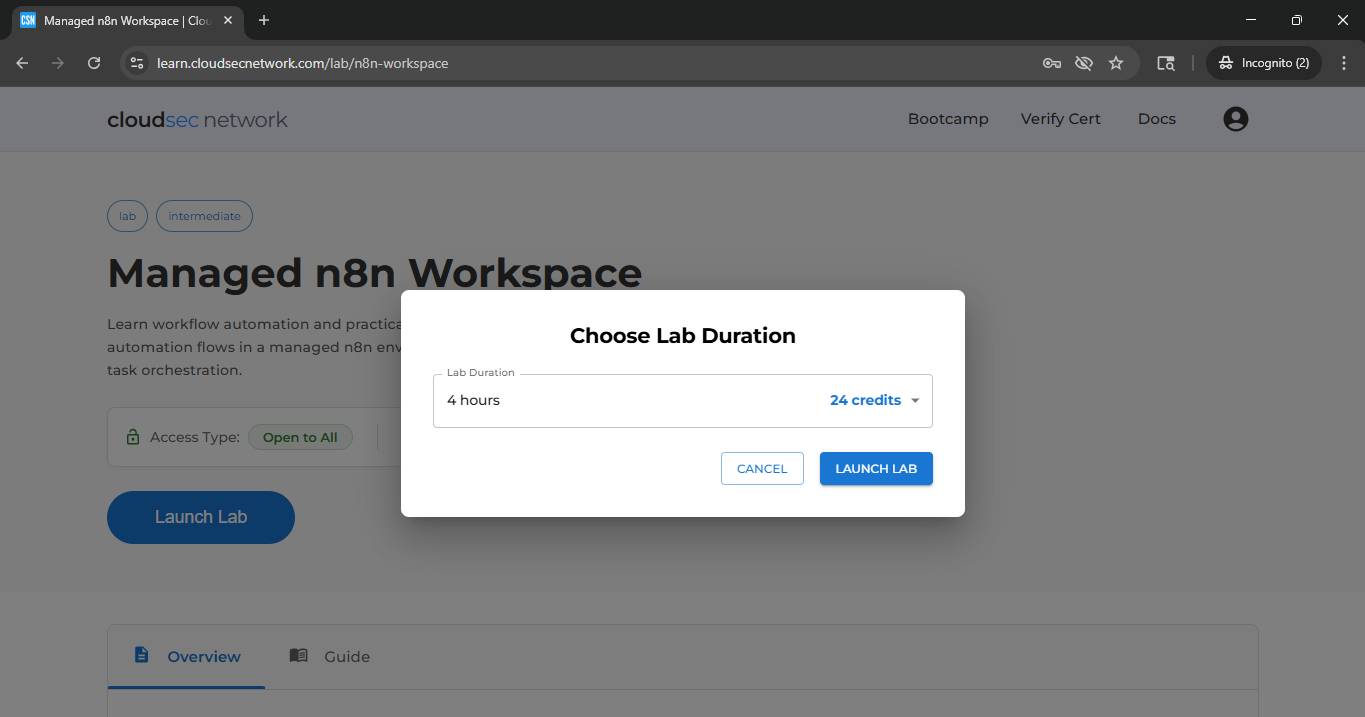
Option A: CSN Labs
Launch n8n in the cloud through CSN Labs:
https://learn.cloudsecnetwork.com/lab/n8n-workspace
Once the lab is created, you receive an n8n URL for the editor.
Option B: Local Docker
You can run n8n locally in Docker. If webhooks must be reachable from outside your machine, expose the instance with a reverse tunnel or another HTTPS endpoint, then set WEBHOOK_URL (and related URLs) to that public base URL.
When n8n sits behind a reverse proxy or tunnel, set N8N_PROXY_HOPS=1 as described in n8n hosting docs.
Pull the image
docker pull docker.n8n.io/n8nio/n8n:latest
Create a volume (persists workflows and credentials across container restarts)
docker volume create n8n_data
Run the container: quick local access
Use this when you only need n8n on your machine (for example http://localhost:5678). Webhook URLs shown in the UI will point at localhost unless you add a tunnel and the HTTPS variables below.
docker run -d --name n8n -p 5678:5678 -v n8n_data:/home/node/.n8n docker.n8n.io/n8nio/n8n:latest
Run the container: public HTTPS hostname (lab / reverse-proxy style)
Replace your-lab-hostname.example with the hostname clients use to reach n8n (no https:// in N8N_HOST). Use the same host in WEBHOOK_URL and N8N_EDITOR_BASE_URL, with a trailing slash. Keep N8N_SECURE_COOKIE=true when serving over HTTPS.
Full docker run with all environment variables (one line; works in bash, zsh, and PowerShell):
docker run -d --name n8n -p 5678:5678 -v n8n_data:/home/node/.n8n -e N8N_HOST=your-lab-hostname.example -e N8N_PORT=5678 -e WEBHOOK_URL=https://your-lab-hostname.example/ -e N8N_EDITOR_BASE_URL=https://your-lab-hostname.example/ -e N8N_SECURE_COOKIE=true -e N8N_PROXY_HOPS=1 docker.n8n.io/n8nio/n8n:latest
Same command split for bash (line continuation with \):
docker run -d \
  --name n8n \
  -p 5678:5678 \
  -v n8n_data:/home/node/.n8n \
  -e N8N_HOST=your-lab-hostname.example \
  -e N8N_PORT=5678 \
  -e WEBHOOK_URL=https://your-lab-hostname.example/ \
  -e N8N_EDITOR_BASE_URL=https://your-lab-hostname.example/ \
  -e N8N_SECURE_COOKIE=true \
  -e N8N_PROXY_HOPS=1 \
  docker.n8n.io/n8nio/n8n:latest
If the container already exists from a quick run, remove it before recreating with new variables: docker rm -f n8n.
In PowerShell, use the one-line docker run above, or continue lines with a trailing backtick (`) instead of \.
Docker Compose (same variables)
services:
  n8n:
    image: docker.n8n.io/n8nio/n8n:latest
    container_name: n8n
    ports:
      - "5678:5678"
    environment:
      - N8N_HOST=your-lab-hostname.example
      - N8N_PORT=5678
      - WEBHOOK_URL=https://your-lab-hostname.example/
      - N8N_EDITOR_BASE_URL=https://your-lab-hostname.example/
      - N8N_SECURE_COOKIE=true
      - N8N_PROXY_HOPS=1
    volumes:
      - n8n_data:/home/node/.n8n

volumes:
  n8n_data:
Troubleshooting: production or test webhooks show localhost
If external services (for example AgentMail) cannot reach your webhook, open the Ingest Emails node in n8n and check the Production or Test URL. When the host is still localhost or 127.0.0.1 (or only http://localhost:5678/... appears), callers on the internet have nothing valid to POST to.
Why localhost appears in the UI:
- n8n builds default webhook URLs from
N8N_PROTOCOL,N8N_HOST, andN8N_PORT. In the deployment environment variables table,N8N_HOSTdefaults tolocalhost,N8N_PORTto5678, andN8N_PROTOCOLtohttp, so the editor often showshttp://localhost:5678/...until you override those values or setWEBHOOK_URL. - Behind a reverse proxy or TLS terminator, the container still listens on 5678 while browsers use 443. n8n recommends a public
WEBHOOK_URL(for examplehttps://your-host/) andN8N_PROXY_HOPS. See Configure n8n webhooks with reverse proxy and endpoints /WEBHOOK_URL. - Set
N8N_EDITOR_BASE_URLto the same URL you type in the browser so editor links match your deployment (deployment variables).
What to do: set WEBHOOK_URL (and related host variables) before you give a public URL to AgentMail or another service; apply them with Docker -e or Compose, then restart or recreate the container. The minimal local docker run without URL variables is fine when you only test from your own machine.
n8n officially supports Docker and Docker Compose for self-hosting (Docker installation). For a minimal local stack only, omit the public URL variables and run the image, port, and volume as in the quick local example.
Initial access and registration
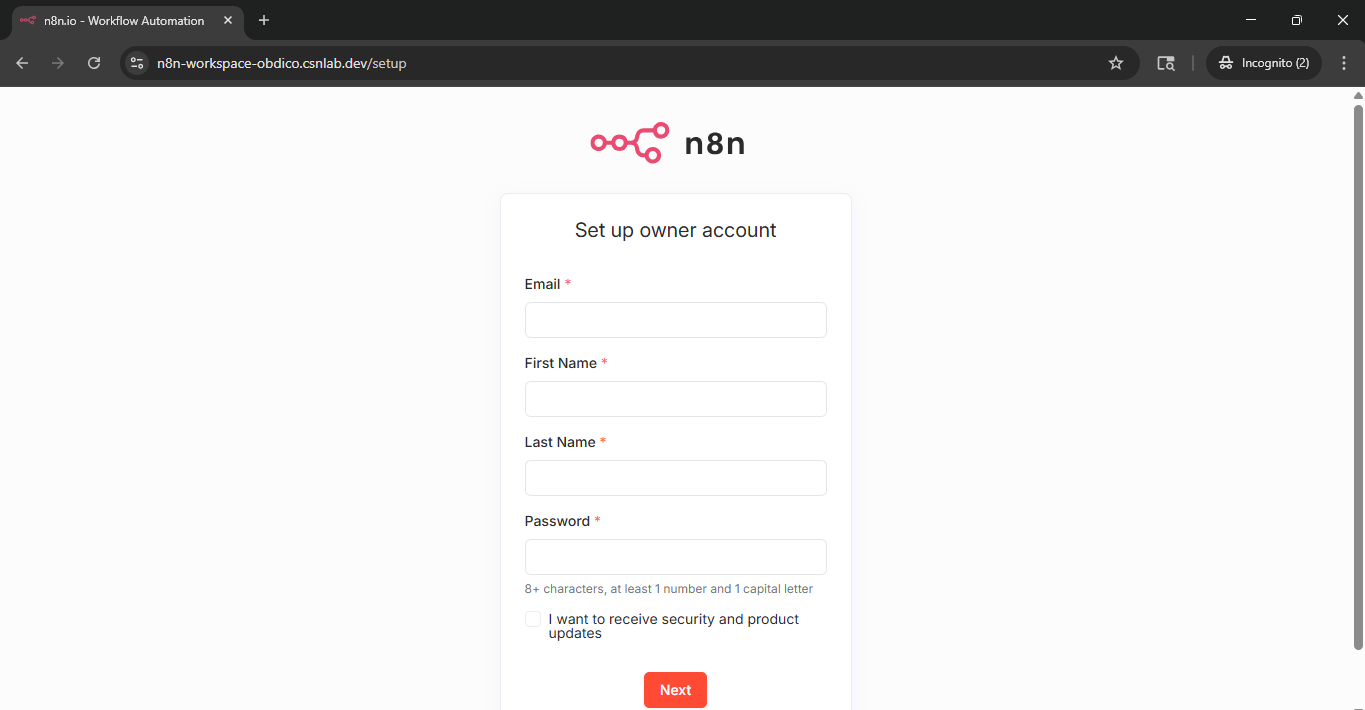
After the instance is ready, open the n8n URL in a browser. In this lab flow, n8n prompts you to register a new account; email verification is not required before sign-up.
- Open the n8n URL.
- Create an account.
- Sign in.
- Land in the n8n workspace / editor.
Create a new workflow
Import the lab template (fastest)
- Download the workflow JSON: csn-week-2-n8n-template.json.
- In n8n: ⋮ menu (or Workflow menu, depending on version) → Import from File → select the JSON.
- Open the
Analyze Email Contentnode and attach your Google Gemini credential (create it if prompted). - Open
Display Results(Code node) and replace its code with the script in step 4 so your output field names match this guide. - Save the workflow.
Build from scratch
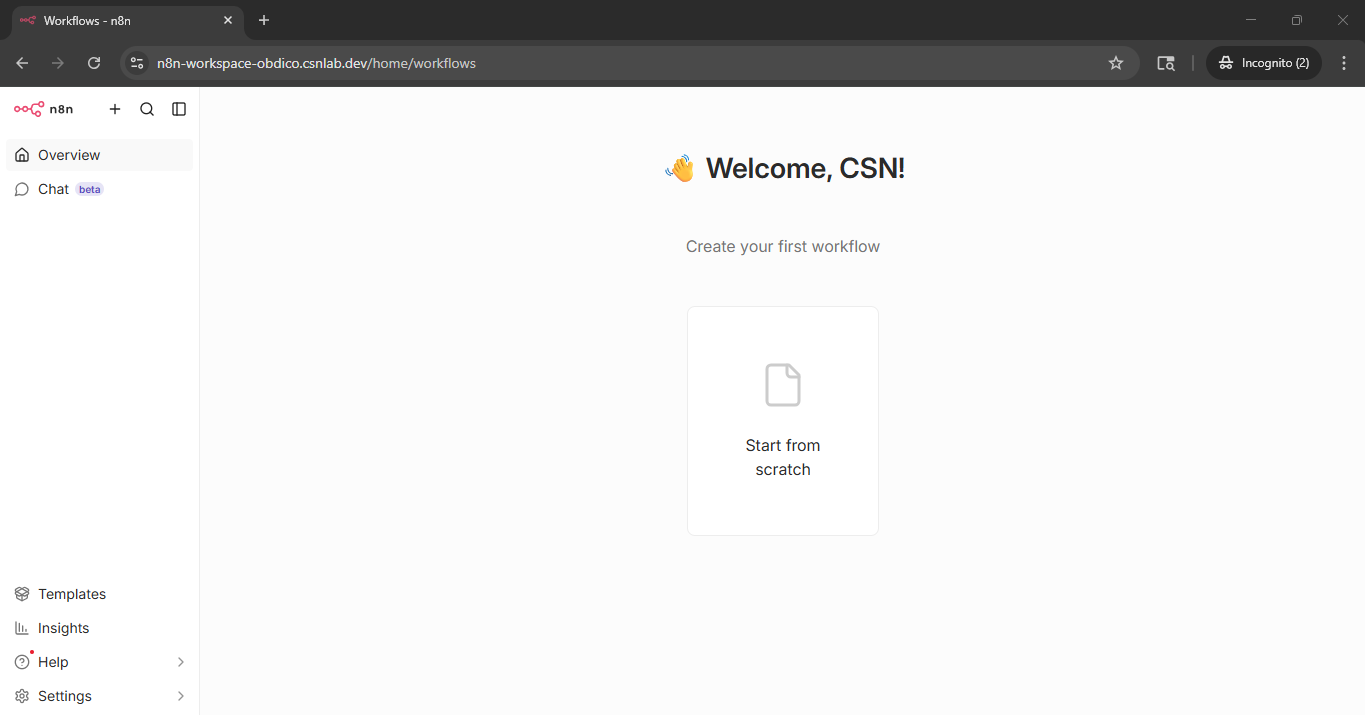
- In the editor, choose Add workflow / Start from scratch.
- Rename the workflow to
Simple Phishing Incident Triage Workflow.
Build the workflow
Connect the nodes in this order: drag from the right-hand output of each node to the left-hand input of the next: Ingest Emails → Parse Fields → Analyze Email Content → Display Results. The sections below add and configure each node (skip any step you already have from the import).
1. Webhook: ingest emails
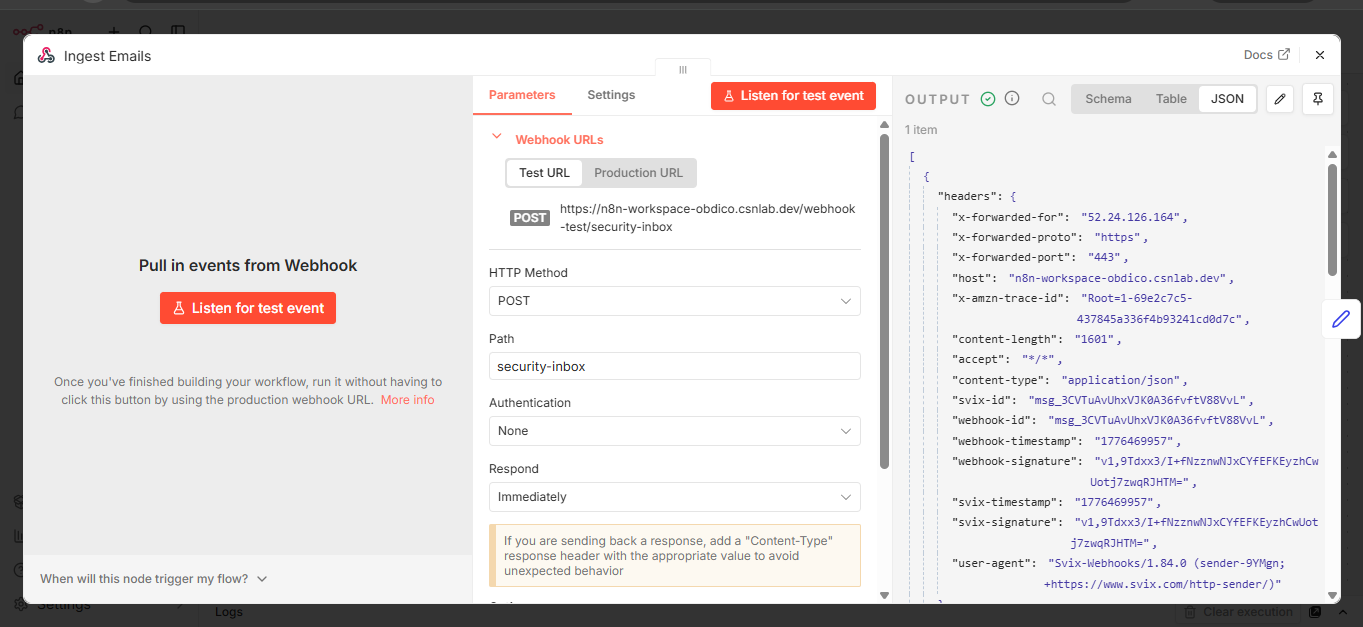
Add a Webhook node and name it Ingest Emails.
Configure:
| Setting | Value |
|---|---|
| Node name | Ingest Emails |
| HTTP Method | POST |
| Path | security-inbox |
| Authentication | None (lab only; not for production) |
| Respond | Immediately |
The table above lists the template-specific settings. Other options can stay at defaults unless you need them.
Beginner note: Respond → Immediately means n8n answers the HTTP request right away and runs the rest of the workflow in the background. That is normal for inbound webhooks (the sender does not need Gemini’s full reply in the HTTP response).
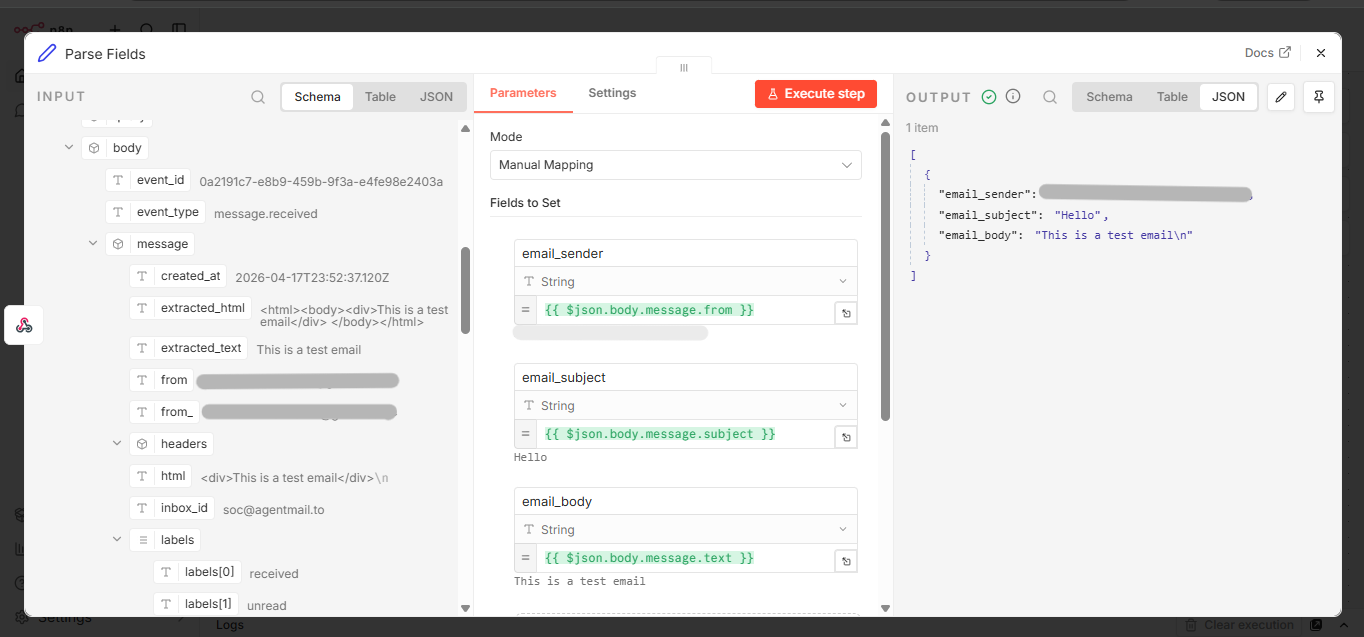
2. Edit Fields (Set): parse fields
Add an Edit Fields (Set) node after Ingest Emails. Name it Parse Fields.
- Set Mode to Manual Mapping.
- Under Fields to Set, add three rows. For each row, set Name and Value exactly as in the table (the Value cells are n8n expressions—paste them including the
{{ ... }}braces).
The workflow expects a JSON body shaped like body.message.* from your sender (for example, AgentMail). If your HTTP payload uses different property names, change the expressions to match.
Assignments:
| Name | Value |
|---|---|
email_sender | {{ $json.body.message.from }} |
email_subject | {{ $json.body.message.subject }} |
email_body | {{ $json.body.message.text }} |
After this node runs, each item’s JSON will contain email_sender, email_subject, and email_body for the Gemini node to read.
3. Google Gemini: analyze email content
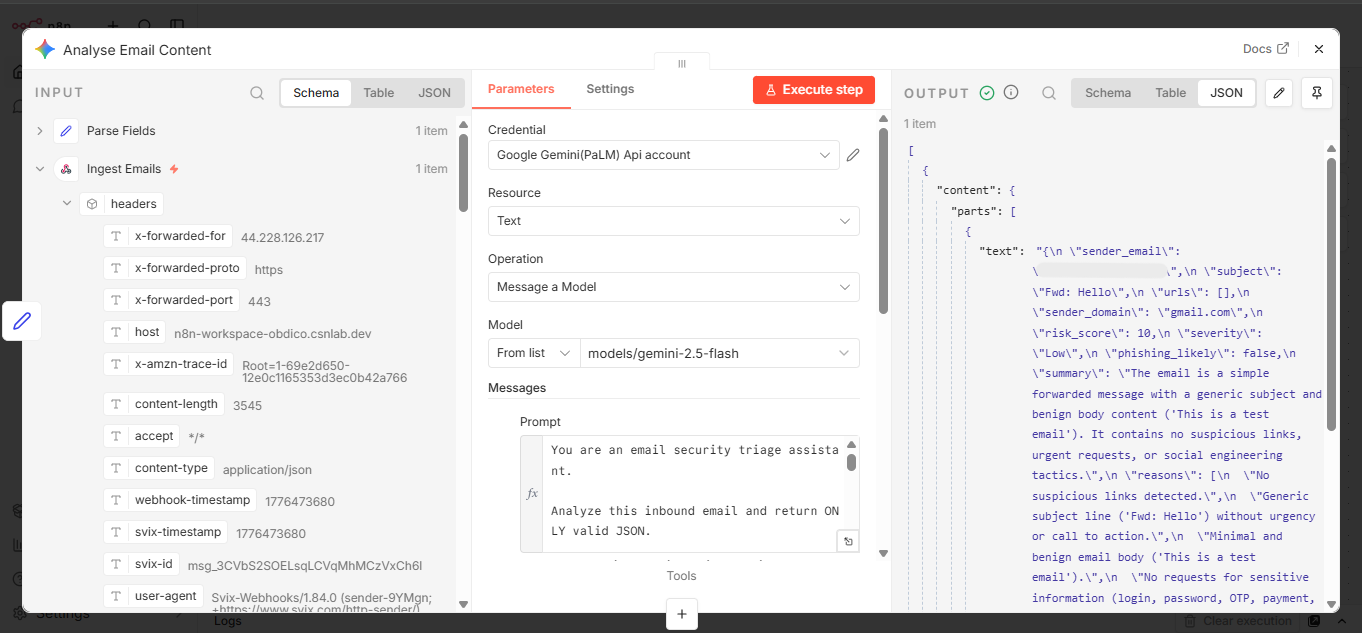
Add another node after Parse Fields. Search for gemini and select the Google Gemini integration. Under Gemini you will see multiple actions; choose Message a model. Name the node Analyze Email Content.
Configure:
- Resource: Text
- Operation: Message a model
- Model:
models/gemini-2.5-flash - Credential: set up a credential (create or select a Google Gemini API credential).
For the API key, open Google AI Studio, sign in with a Google account, then use Create API key to create a free Gemini key.
Under Messages, paste the prompt below. Set Role to user.
Because Parse Fields runs immediately before this node in this lab, the Email: lines use email_sender, email_subject, and email_body. If you connect Gemini directly to the webhook and skip Parse Fields, use the alternate Email: lines shown after the main prompt.
You are an email security triage assistant.

Analyze this inbound email and return ONLY valid JSON.

Your tasks:
1. Extract the sender email.
2. Extract the subject.
3. Extract any URLs found in the email.
4. Determine whether the email is likely phishing.
5. Assign a risk score and severity.
6. Summarize why.
7. Recommend an action.

Important rules:
- Urgency, account verification requests, login prompts, OTP requests, payment requests, password resets, suspicious links, and social engineering language should increase risk.
- Public email providers can still be used in phishing.
- Return raw JSON only.
- Do not use markdown.
- Do not wrap the response in code fences.

Email:
Sender: {{ $json.email_sender }}
Subject: {{ $json.email_subject }}
Body: {{ $json.email_body }}

Scoring scale:
- 75 to 100 = High
- 40 to 74 = Medium
- 0 to 39 = Low

Return exactly this JSON structure:
{
 "sender_email": "",
 "subject": "",
 "urls": [],
 "sender_domain": "",
 "risk_score": 0,
 "severity": "Low",
 "phishing_likely": false,
 "summary": "",
 "reasons": [],
 "recommended_action": ""
}
This configuration asks Gemini to return only raw JSON in a strict schema. In the Gemini node’s Options (or Settings, depending on n8n version), leave URL context / browsing features off unless you deliberately want the model to fetch links (not required for this lab).
Alternate Email: block (only if you connect the webhook directly to Gemini and skip Parse Fields):
Sender: {{$json.body?.message?.from || ''}}
Subject: {{$json.body?.message?.subject || ''}}
Body: {{$json.body?.message?.text || ''}}
The prompt tells Gemini to:
- Extract the sender email
- Extract the subject
- Extract URLs
- Decide whether the email is likely phishing
- Assign risk score and severity
- Summarize the reasons
- Recommend an action
4. Code: display results
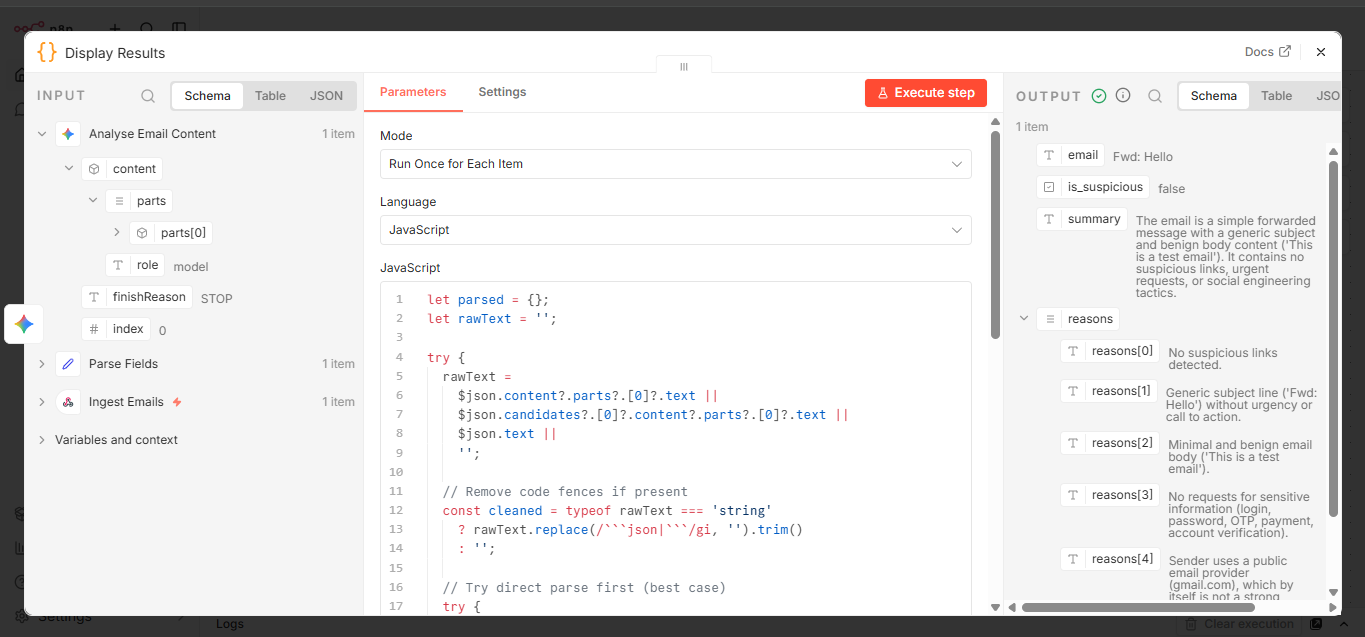
Add a Code node named Display Results.
- Mode: Run Once for Each Item (one output row per incoming email item).
- Language: JavaScript (may appear as JavaScript in the node panel).
Paste this code:
let parsed = {};
let rawText = '';

try {
  rawText =
    $json.content?.parts?.[0]?.text ||
    $json.candidates?.[0]?.content?.parts?.[0]?.text ||
    $json.text ||
    '';

  // Remove code fences if present
  const cleaned = typeof rawText === 'string'
    ? rawText.replace(/```json|```/gi, '').trim()
    : '';

  // Try direct parse first (best case)
  try {
    parsed = JSON.parse(cleaned);
  } catch {
    // Fallback: extract JSON block (greedy to capture full object)
    const match = cleaned.match(/\{[\s\S]*\}/);
    if (match) {
      parsed = JSON.parse(match[0]);
    }
  }

} catch (error) {
  parsed = {
    error: 'Parsing failed',
    raw_output: rawText
  };
}

return {
  json: {
    sender_email: parsed.sender_email ?? '',
    parsed_subject: parsed.subject ?? '',
    urls: parsed.urls ?? [],
    sender_domain: parsed.sender_domain ?? '',
    risk_score: parsed.risk_score ?? 0,
    severity: parsed.severity ?? 'Low',
    phishing_likely: parsed.phishing_likely ?? false,
    ai_summary: parsed.summary ?? '',
    ai_reasons: parsed.reasons ?? [],
    recommended_action: parsed.recommended_action ?? '',
    debug_error: parsed.error ?? null
  }
};
The Display Results node takes the JSON returned by Gemini and maps it to output fields for later routing and logging. Output fields include sender_email, parsed_subject, urls, sender_domain, risk_score, severity, phishing_likely, ai_summary, ai_reasons, and recommended_action.
Test the workflow
The Ingest Emails webhook exposes two URLs. They are easy to mix up:
| Test URL | Production URL | |
|---|---|---|
| When to use | While you are in the editor: open the webhook node, click Listen for test event, then trigger one request. | After you activate the workflow (toggle Active on). AgentMail and other integrations should use this in production. |
| Typical behavior | Often a temporary or editor-specific URL; good for debugging. | Stable for your instance while the workflow stays active. |
During development, use the Test URL and Listen for test event so you can see the payload and execution without turning the whole workflow on.
To exercise the path like a real mailbox, use AgentMail: you get an inbox, and when mail arrives AgentMail POSTs a structured event to your n8n webhook so the same nodes run as in production.
Create an account on AgentMail
Sign up at agentmail.to. Once logged in, you can create and manage inboxes for your agents.
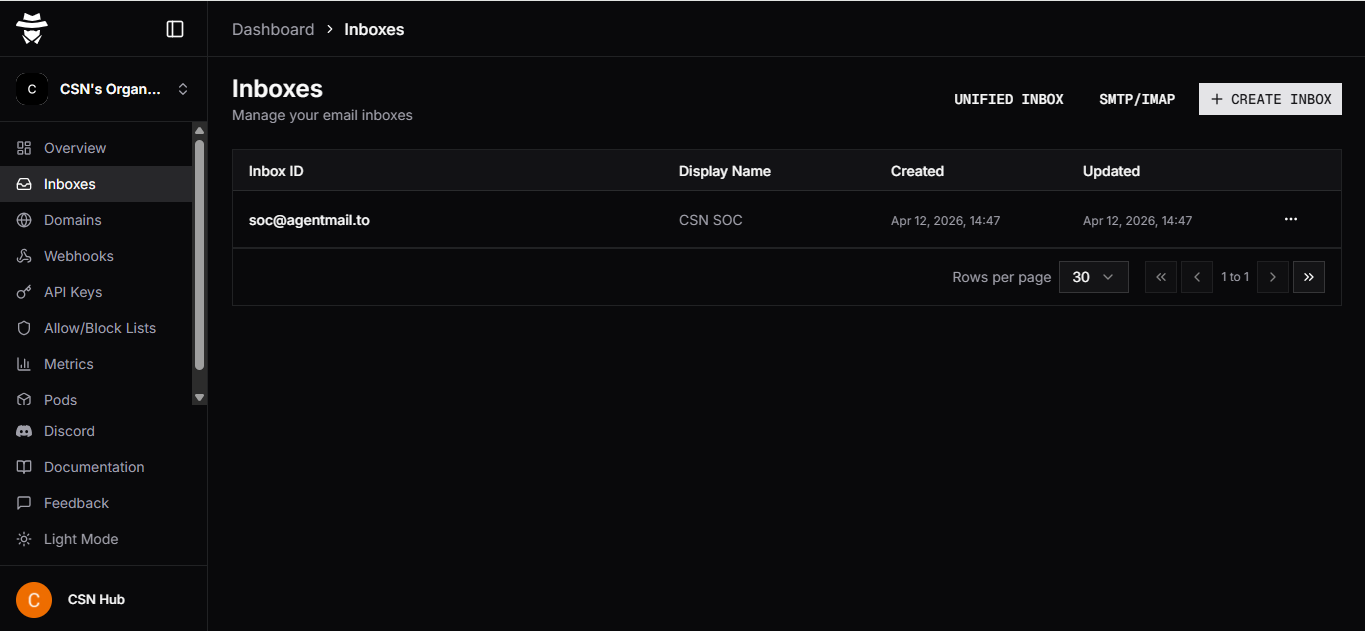
Create a dedicated inbox
After signing in, open Inboxes from the left-hand menu. The page lists all inboxes in your workspace. In the top-right corner, select Create Inbox.
A dialog asks you to configure the inbox. Provide:
- Username
- Domain
- Display Name
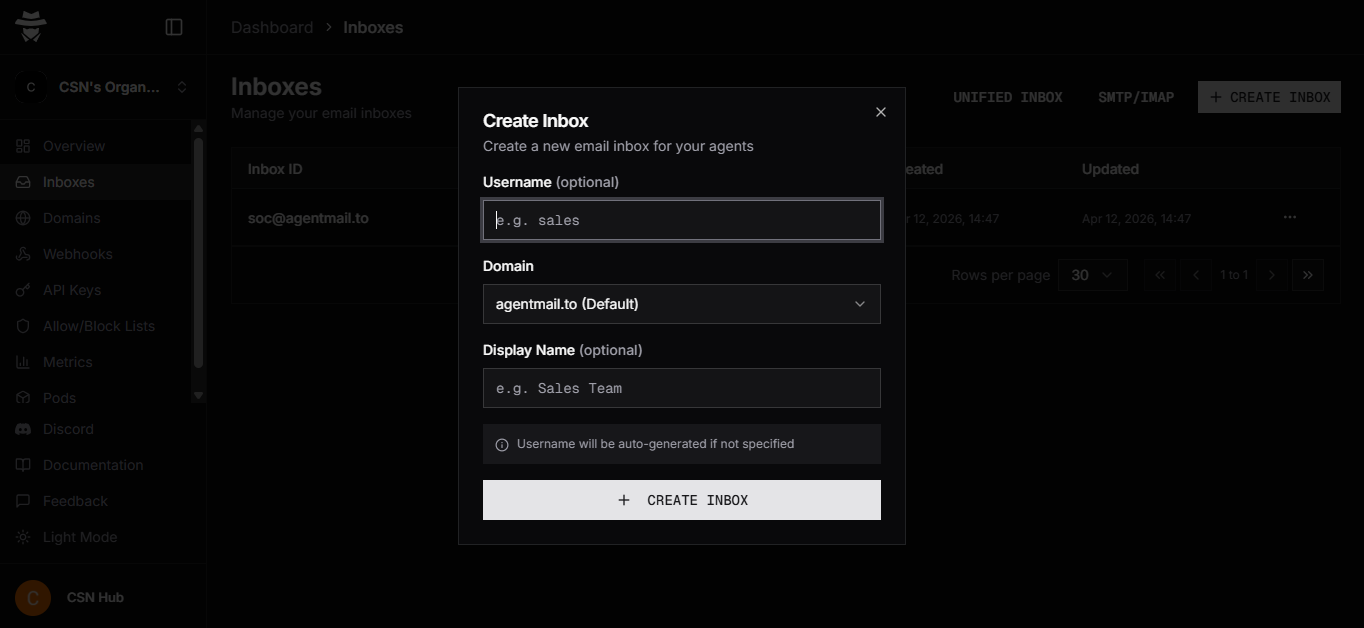
After you fill in the required fields, click Create Inbox. The inbox appears in the list and can receive email right away.
Configure the AgentMail webhook
Creating the inbox is only the first step. AgentMail must know where to send message events when mail arrives.
Open Webhooks from the left navigation. On the Endpoints tab, create a new webhook endpoint and paste your n8n webhook URL.
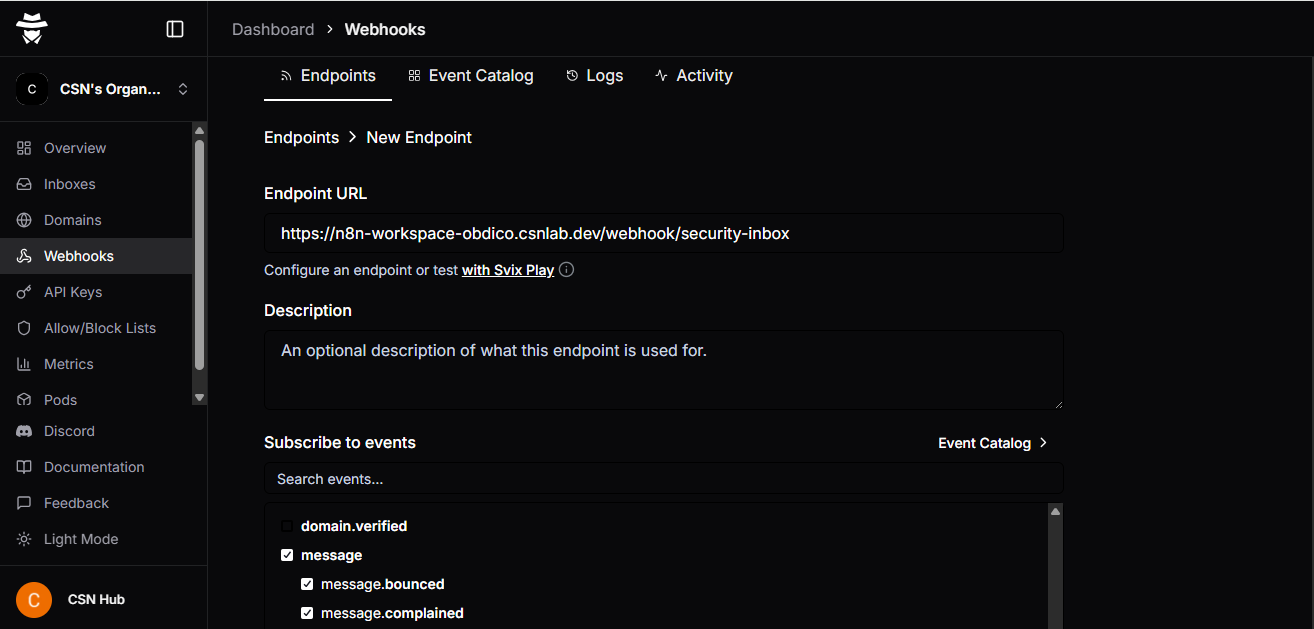
AgentMail posts to the full n8n webhook URL you paste into the endpoint; that URL includes the path segment security-inbox, matching the Ingest Emails node’s Path setting.
While you validate the workflow, the Ingest Emails node usually exposes a temporary test URL. Use that URL while the node is listening for a test event. After the workflow is finalized and activated, update the AgentMail endpoint to the production URL (see Go live).
Select the event types to forward
Below the endpoint URL in AgentMail is Subscribe to events. That controls which events AgentMail sends to the webhook.
For this workflow, the most important category is message. It contains email-related events and lets inbound message activity reach n8n.
At that point, the integration works as follows:
- An email is sent to the dedicated AgentMail inbox.
- AgentMail receives the email and generates the subscribed
messageevent. - That event is sent to the configured n8n webhook endpoint.
- The n8n workflow starts and processes the payload.
Go live
- In n8n, open your workflow and turn the Active toggle on (top of the editor). Until the workflow is active, the Production webhook URL will not accept traffic the way a live integration expects.
- Copy the Production URL from the
Ingest Emailsnode (not the Test URL) into AgentMail’s webhook endpoint (or your other caller). - Send a test email to the AgentMail inbox and confirm a new Execution appears in n8n’s execution list with the expected output on
Display Results.